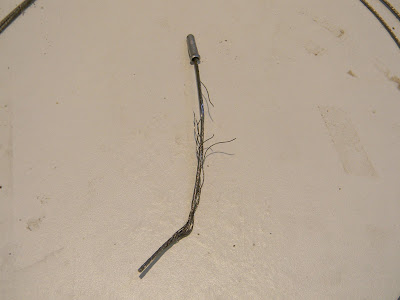
Before NOLA, I noticed my front shifter cable was starting to fray. I've slowly been watching the deterioration of the cable, waiting until it had to be replaced. On my ride last weekend, it started making an unnatural screeching noise when I popped it up into the big chain ring. Between the banshee-like sound effects and the seriously frayed cable, I decided it was finally time to replace it.
Off to the LBS I go! (Where I also got a lead on a used Madone 5.2, size 52 WSD. Cross your fingers and pray for me that the deal works out.)
After John got his bike, he realized there was a reason I've been asking for a bike stand. We finally got one, and it has made my life much easier. Up you go, Thelma!

I pulled out my tools, degreaser, new parts, and put on some tunes. Ready to rock.

Here's the frayed wire before.

This was actually really easy. I made sure it was in the small chain ring, then removed the screw that clamps the cable in place. I took wire cutters and cut below the frayed cable so I wasn't pulling loose wire pieces through the cable housing. Then I removed the shifting lever so I could get at the top of the housing easier.

I used degreaser with a narrow nozzle to clean out the housing. I basically sprayed until it was dripping out the other side. Then I (carefully) blew air through the housing to force any crap out the back and help it dry. While it dried, I took off the bar tape from my aero bars and rewrapped the right side in melon green. I should have picked up another package so I could have done the bullhorns at the same time.
Once it was dry enough, I took the new cable and greased it. I threaded it through the shifting lever and into the housing, then replaced the shifting lever and tightening it down. The cable went through easy enough and I had plenty on the other side.

I tightened it down and shifted a few times to make sure it was working. I had to give it a little slack, but it went in easily. I clipped the cable off, put on a cap and crimped the end. Viola! Easy peasy.

After I cleaned up the grease and degreaser, I wrapped the left bar and took her out for a test ride. The shifter works well and the banshee screeching has disappeared. All in all, this took me less than an hour, and that included wrapping bars and waiting for the housing to dry.

This was an easy task and I would say anyone who knows how to use an allen wrench could do it. The bike stand definitely made the work more comfortable, and you should read your owner's manual before starting work you've never done. Mine had very basic instructions on how to replace a cable, which was all the information I needed. I asked a few basic questions at the bike shop and I didn't have a problem.
If you need to replace a cable, you may be able to get a leftover piece of cable for free from your LBS. If you do this, I have one recommendation. Before you try to thread the cable into the housing, make a clean cut on the end and solder the wire together or ask the LBS if they can solder the tip for you. When I tried to push the leftover cable through, one of the wires got caught on the narrow tube at the end of the housing and unravelled the wire. New cable comes with the end pre-soldered and the new cable went through without a problem.
Cost of the cable - $4.99. Doing your own maintenance - priceless.


1 comment:
Congrats! I am not too handy when it comes to stuff like that but I guess I shouldn't be such a wuss!
Post a Comment